Saturday, March 21, 2015

Is it a Bird or a Plane?.......no its Super Man


I love getting to do boy cakes because its great practice for when my baby boy gets old enough for birthday parties.  This Super Man cake was my first cake that I had to cut into a shape and boy was I worried about how it would turn out.  But as you can see it turned out pretty awesome.
Here is the how to:
1.  Colors of frosting needed: white, blue, yellow, red, and black  (I used Butter Cream)
2.  The Super Man symbol: I used my Silhouette cutter/ program but you can also print off the symbol and then cut out. 
3.   Cake: 12 inch square cake pan and a double layer cake with a filling.  Allow the cake and filling to set in the fridge for a couple hours.  This will help the cake to stay firm when cutting into the shape.
4. Take to shape of the symbol and pin it onto the cake.  As you can see I used tooth picks to keep the symbol in place.  Use a bread knife and saw along each line carefully.  

5.  Time to crumb coat the cake with white frosting.  This is a very important step after cutting a cake into a shape.  Cover whole cake with a very thin layer of white frosting and place back into the fridge. ( You will be putting the cake into the fridge many times so be ready. :) )
6.  Time for the Blue frosting:  Cover the sides with a nice layer of blue frosting.  Smooth out as best as you can. (tip: I use a cup of very hot water, paper towels, and a frosting spatula.  Dip the spatula into the hot water and then dry on a paper towel.  Slowly run the hot spatula edge along the side of the frosted cake to smooth out.)
7.  Add a blue boarder along the bottom edge of the cake.

8.  Cover the top or face of the cake with yellow frosting.  Smooth out and place into the fridge for twenty minutes.
9. Now take the symbol and lay on top of the cake.  I used a tooth pick and traced the out line into the yellow frosting. Place into the fridge for five minutes to help harden the frosting once more and then slowly peal off the paper symbol.

10.  Place the red frosting into a piping bag and fill in the portions of the symbol that are red. Smooth out.  I printed off a picture of the symbol so I could see exactly what should be red.
11.  Place black frosting into a piping bag with a #5 tip.  Outline the red with the black to complete the symbol.  Place into the fridge to set the frosting.

Thursday, March 19, 2015

Grasshopper Cupcakes (St. Patrick's Day)

Grasshopper Cupcakes

When I was in College my mom would always order me an Ice Cream cake or pie from Baskin-Robins for my Birthday.  One year I got a grasshopper pie which was one of my most favorite combinations of flavors, Chocolate and mint. So this year for St. Patrick's Day I wanted to make a cupcake with those flavors.....you have to have green for the day so it was perfect.  This cupcake has three different components: cake, chocolate shell, and frosting.
You will make these and then not want to share with another soul or maybe that is just me when I want CHOCOLATE. :)
Be ware these are so yummy and dangerous.......Happy baking
Dark Chocolate cake
(recipe comes from Hershey's Special Dark Cocoa tub)

2 c. sugar     
1 3/4 c. All-purpose flour
3/4 c Hershey Special Dark Cocoa
1 1/2 tsp. baking soda
1 1/2 tsp. baking powder
1 tsp. salt
2 eggs
1 c. milk
1/2 c. veggi oil
2 tsp. coffee extract or vanilla extract
1 c. boiling water

1. Heat oven to 350 degrees.   2. Stir together all dry ingredients    3. Add eggs, milk, extract, and oil: mix well.   4. Slowly stir in boiling water (batter will be thin)   5.  Scope 1/4 cup batter into prepared cupcake wrappers.   6.  Bake for 15 minutes    7.  Allow to cool before moving to next component.

Chocolate Shell

1 cup Dark chocolate chips
3 Tablespoons of heavy whipping cream

1.   Place into a microwave bowl and cook for 1 minute
2.   Stir until a smooth chocolate sauce is formed
3.   Dip top of cooled cupcake into the chocolate sauce
4.   Place into the fridge to help the Chocolate form a shell

Mint Butter-cream Frosting

1/2 lb or 2 sticks unsalted butter, softened
1 tablespoon of mint extract
6 drops of green food coloring
4 c. shifted powder sugar
3 tablespoons heavy whipping cream

1. Use whipping attachment on mixer and whip butter, extract, and food coloring for four minutes
2. Slowly add in powder sugar and cream until well mixed.
3. Turn on high and whip for 2-3 minutes
4. Top cupcakes and eat!!

Saturday, March 14, 2015

Mario Brother screen shot cupcakes

I was asked to create Mario themed cupcakes for my friends little man.  I was lost on how to make cupcakes without using paper inserts, so started my search  online.  I came across a group of screen shots that were a great inspiration.  With these screen shots I drew out my design.


There are 36 cupcakes in this display.  I used blue modeling chocolate and a 1" circle cutter to make the background bases. All the other designs in the screen shot were also created out of modeling chocolate.  They were attached with a little corn syrup painted on the backs and lain onto the blue circles.  I allowed these circles to sit out a couple days to firm up to hold its shape while on the cupcake. They lay on top of a cookie sheet and parchment paper dusted with corn starch.
Once the circles have sat a couple days place them on top of lightly frosted cupcakes which are already lain out in the pattern 6 by 6.  Then you will have a fun and unique screen shot display.

Frozen Dessert Table

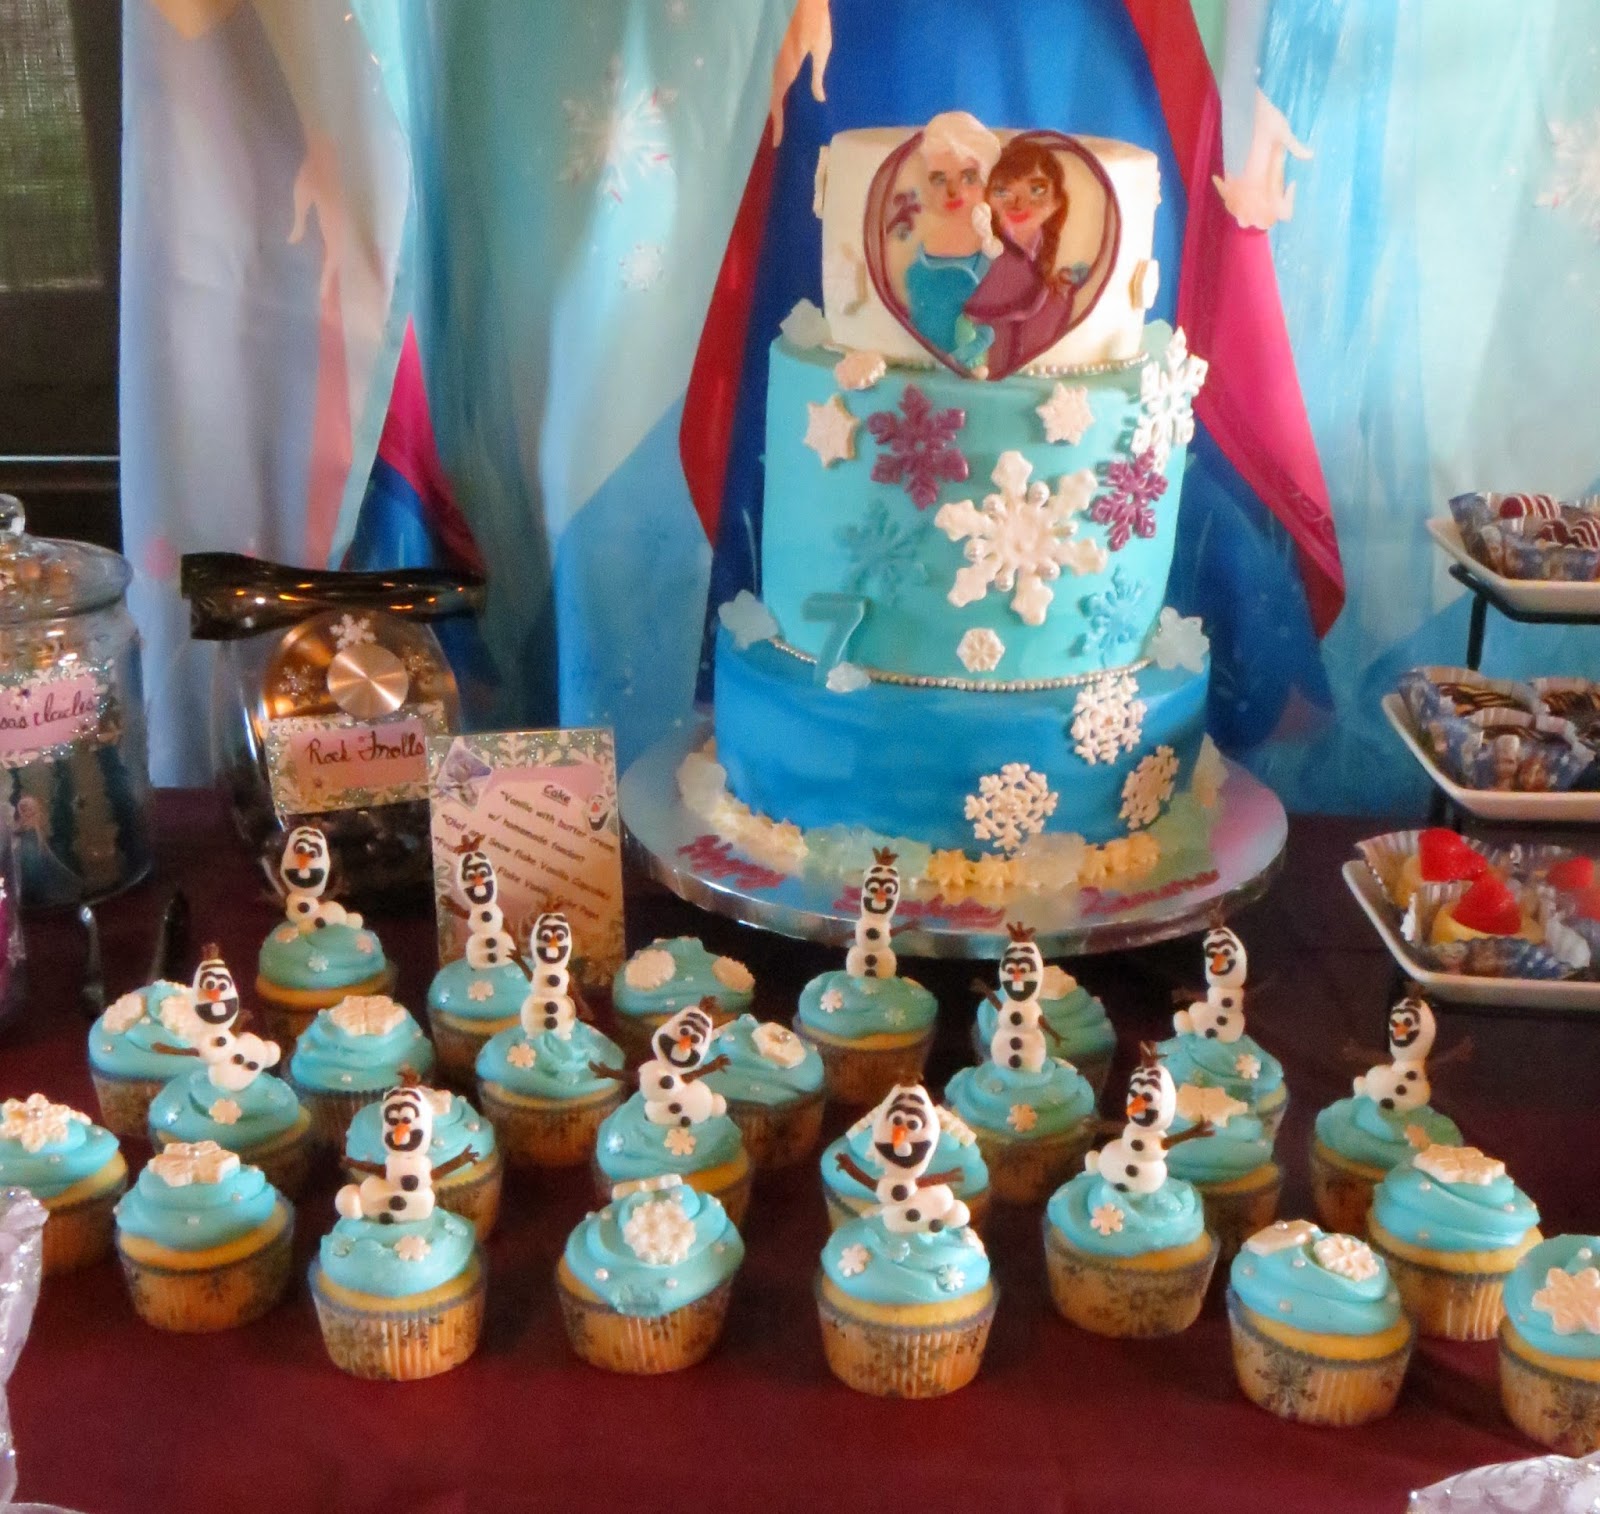
Frozen birthday parties are all the rage.  I was asked to create a whole dessert table to represent the Movie for a young lady turning seven.  She loved the table and all the treats.  I love to make any birthday kiddo happy with the treats I make for them.

Now the cake was super fun to design but oh I hate trying to create faces.  I painted and re-painted the noses ten times and then gave up.  So please do not be to harsh with my faces as it was the first time for me.  I do love how the girls dresses turned out it is all made out of modleing chocolate.  The large snow flakes are hand piped chocolate and the small ones where from a chocolate mold.


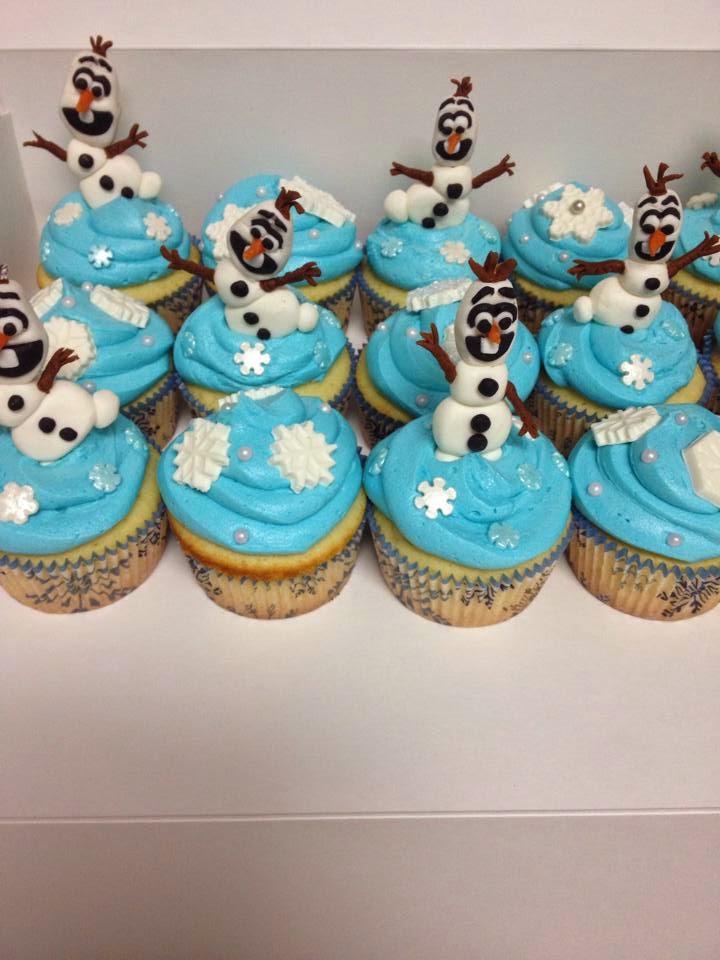
Now to the cupcakes:  Half had snow flakes and the other half Olafs created out of modeling chocolate.  I printed a picture of Olaf at the size I wanted to create.  Then taped the picture down with a piece of wax paper taped on top of that.  With the white chocolate I molded balls and shaped them on top of the picture to get the same size and shape for each.  I inserted a tooth pick into the bottom and up through each ball to hold them together.  His face was not easy but I just pulled out each shape and tried to match.  The arms where the hardest to make;  I used a thin wire and covered with brown fondant.

Other treats I created for the table were cake pops,
chocolate cover pretzel rods,
 Snow flake sugar cookies,

cheese cake bits, and Rice treat pops.


I had a blast putting this party table together.

Saturday, January 10, 2015

Bridal Shower Cakes

A young lady at my Church is about to get Married.  I have the honor of creating her cake and cupcakes for the big day.  But I also did her bridal shower cakes. Her favorite color is purple and she loves butterflies and flowers.
I have been taking cake classes on Crafty.com which has been a wonderful learning experience. If you would like to learn how to do the dot pattern on my cake take "Clean & Simple Cake Design" with Jessica Harris.  Please take your time to check Crafty.com out as it has many classes on cake decor and many other things.


The dots, butterflies, and dress are made out of modeling chocolate which is home made. Jessica Harris also teaches you how to make modeling chocolate and fondant in her class.  I also learned how to make fondant from this link:  http://www.howdoesshe.com/easy-marshmallow-fondant-you-can-do-it/
I am very excited about getting to do her Wedding Cake very soon!! :)

Ballerina Birthday

Happy 4th birthday to my sweet little, lady Olivia. As you can see we had a ballerina themed birthday this year.  Olivia loves to dance and the color pink so I felt this was the perfect party to create for her.  The beautiful picture of Olivia was taken by Provosto Photography, She is a military wife and knows how to use natural light to make a picture come to life.  Thank you Amber for these memories!!

I went small on the treats this year, as we are living in a new location with not as many friends to attend the celebration.  The cake was a double chocolate cake with pink butter cream and home made fondant flowers.  http://www.howdoesshe.com/easy-marshmallow-fondant-you-can-do-it/#  here is the link on how to make Fondant, super easy!!


Ballerina dress cupcakes
I used a small heart cutter for the top of the dress. I used fondant but suggest you use modeling chocolate as it is a stiffer medium. Butter cream was used to design the tutu part Wilton tip # 104.  Cake was a vanilla cake with fresh strawberries.
Marshmallow ballerina slippers
I have a bow chocolate mold that I first filled and allowed to set.  Then insert the stick into the top of a big marshmallow.  Melt pink melting chocolate (make sure to add a little veggie oil to thin out), dip the sides set down on wax paper to harden. (tip I throw them into the fridge)  Put left over pink chocolate into a sandwich bag.  Cut the tip off the bag and pipe the strings onto the front of the slipper.  Add a little chocolate to the stick and place bow onto the chocolate.

 
Welcome to our party set up: You will see a lot of pink :)  The banners where made with my silhouette cutter which I just love when it comes to making things for parties!! The flowers where designed by my wonderful mother-in-law.


Party Favors: I made Tutu's for each little lady that came to the party and also had a friend make hair bows.  Instead of goodie bags I did goodie jars filled with candy. 


Oh course every party must have a party game: We played pin the tutu on the ballerina

Then we had an art time where the girls made ballerina hand dresses and the boys created a hand pirate.  I used my cutter to cut out the leotard and then glued it on so the girls only had to go the hand prints.  It was a very fun and super cute project. 

I am blessed to have my little lady but cannot believe she is already four.  My prayer is for her to have a great year of learning and adventures!!


Sunday, July 6, 2014

Princess Sofia

Sofia the first is a Disney Jr. princess that most little girls love and want to be like.  She is sweet, kind, and helpful which is what every mother wishes for her little girl.  I was asked to create a cake that represented Sofia without having her right out on the cake which I do prefer to make.  I got to try out a few new techniques on this cake which I loved learning.
The Bottom level cake was created with fondant to create the look of a skirt and the top level cake I used butter cream to make roses with a few fondant flowers.  I also learned how to make a princess crown out of gym paste and Sofia's necklace.

I would like to share how I did the bottom tier to make the skirt look, out of fondant:


 You will need:  Fondant circle cutter, form square, ball tool, and saran wrap
     Cut out a handful of circles and cover with the saran wrap. This will help the fondant from drying out right away. Place a couple of the circles on the form square and use the ball tool to flatten out half of the circle.  Press the side of the circle you did not press flat onto the cake in a neat row around the circumference of the cake.  As you can see in the picture below the side of the fondant circle you rolled out flat has a flowing look to it.  I used my fingers to help add a little detail for a flow to the skirt.

 As you start the next layer of circles do not make them flush with the bottom layer
I added white pearls to give a jewel affect to the top level.  Play with the skirt until you like the looks of the flow.  Add the second layer of cake after you have finished adding the fondant circles.  Put at least three wooden dowels into the top of your cake to help it be sturdy.  Now add your rose butter cream design around the sides.  I put a large circle of purple fondant on the top of the cake to place the crown and number five onto.


Now to the crown and necklace this was my first time working with gym paste which hardens faster then fondant and holds a much stronger piece.  I am not going to explain how I made these because I need more practice before being able to explain.  But if you want to learn how watch videos on you tube, that is what I did. :)