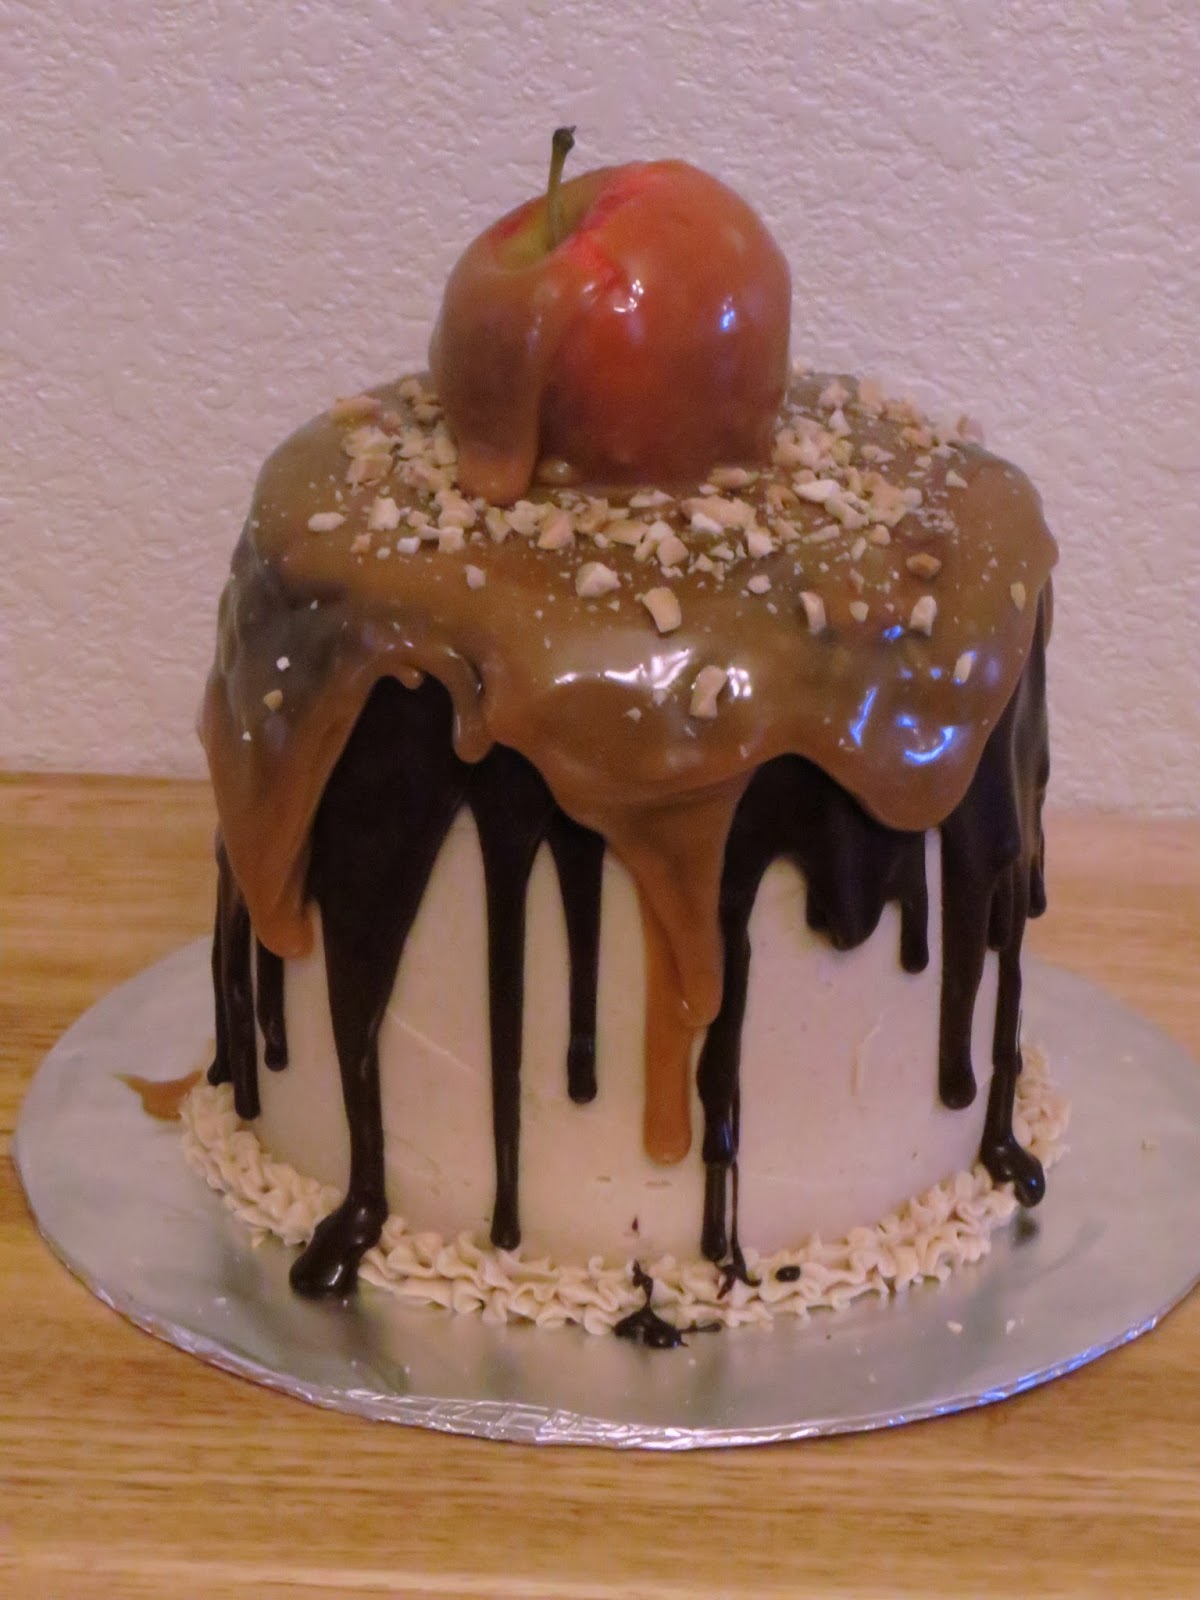
So my favorite candy bar is a snickers bar. So when I decided to make this cake I was excited to combine all these flavors together Chocolate.........Peanuts.......and caramel, oh my!!
 |
Snickers Cake w/ a caramel apple on top
|
Chocolate Cake: make three cake layers
adapted from:Hershey's Special Dark Cocoa
2 c. sugar
1-3/4 c all purpose flour (I do the 1 cup all purpose and the 3/4 c cake flour)
3/4 c special Dark cocoa powder
1 1/2 tsp baking powder
1 1/2 tsp baking soda
1 tsp salt
(mix all of these together in the mixer first)
2 eggs
1 c milk
1/2 c vegetable oil
2 tsp vanilla extract
(mix all of these together in a med. size bowl)
1 cup boiling water
Directions: Oven 350 degree
1. Mix all the dry ingredients together in the mixer bowl. Be careful it will spray every where if to fast.
2. Mix all wet ingredients in a med. bowl expect the boiling water. Slowly add to dry ingredients until mixed well.
3. Add the boiling water very very slowly.
4. Pan preparation: Spray pan with spray oil, line the bottom with parchment paper, then fill with cake batter. You will need to separate batter into thirds.
5. Bake 30-35 minutes, remove from oven, allow to cool for 5 minutes, and then remove from pan.
 |
Cake layers with Peanut butter frosting filling
|
Peanut Butter Frosting:
1/2 cup softened unsalted butter
1 cup creamy peanut butter
4 cups shifted powder sugar
4-6 tbs heavy whipping cream
Directions:
1. Whip the softened butter in the mixer with the whisk attachment (about 2-3 minutes)
2. Add the peanut butter and whip (about 2 minutes) scrap the sides of the bowl
3. With mixer at the slowest speed Add one cup of powder sugar then 1 tbs of heavy whipping cream. Continue till all sugar is gone. If the frosting is super thick add at least one or two more tbs of cream. Whip for another 2 minutes
Once Cake is completely cooled level the tops and begin to build: Cake, frosting, cake, frosting, and the last cake. Smooth out the frosting around the layers and place into the fridge.
Remove the cake from the fridge and frost with a crumb coat first set back into the fridge for 20 minutes. Finish putting a nice layer of frosting all over the cake. Make a frosting boarder at the base of the cake. Smooth it as best as you can or as much as you want and then place back in fridge while you make the chocolate sauce.
Chocolate sauce:
2 cups of chocolate chips
1 cup heavy whipping cream
Place both into a double broiler or into a microwave safe bowl. Melt the chocolate slowly use a whisk and whip the two together until a smooth sauce has been formed. Allow to cool on the counter for just a few moments. If you allow it to stand to long it will harden and you will not be able to pour it over the top of the cake.
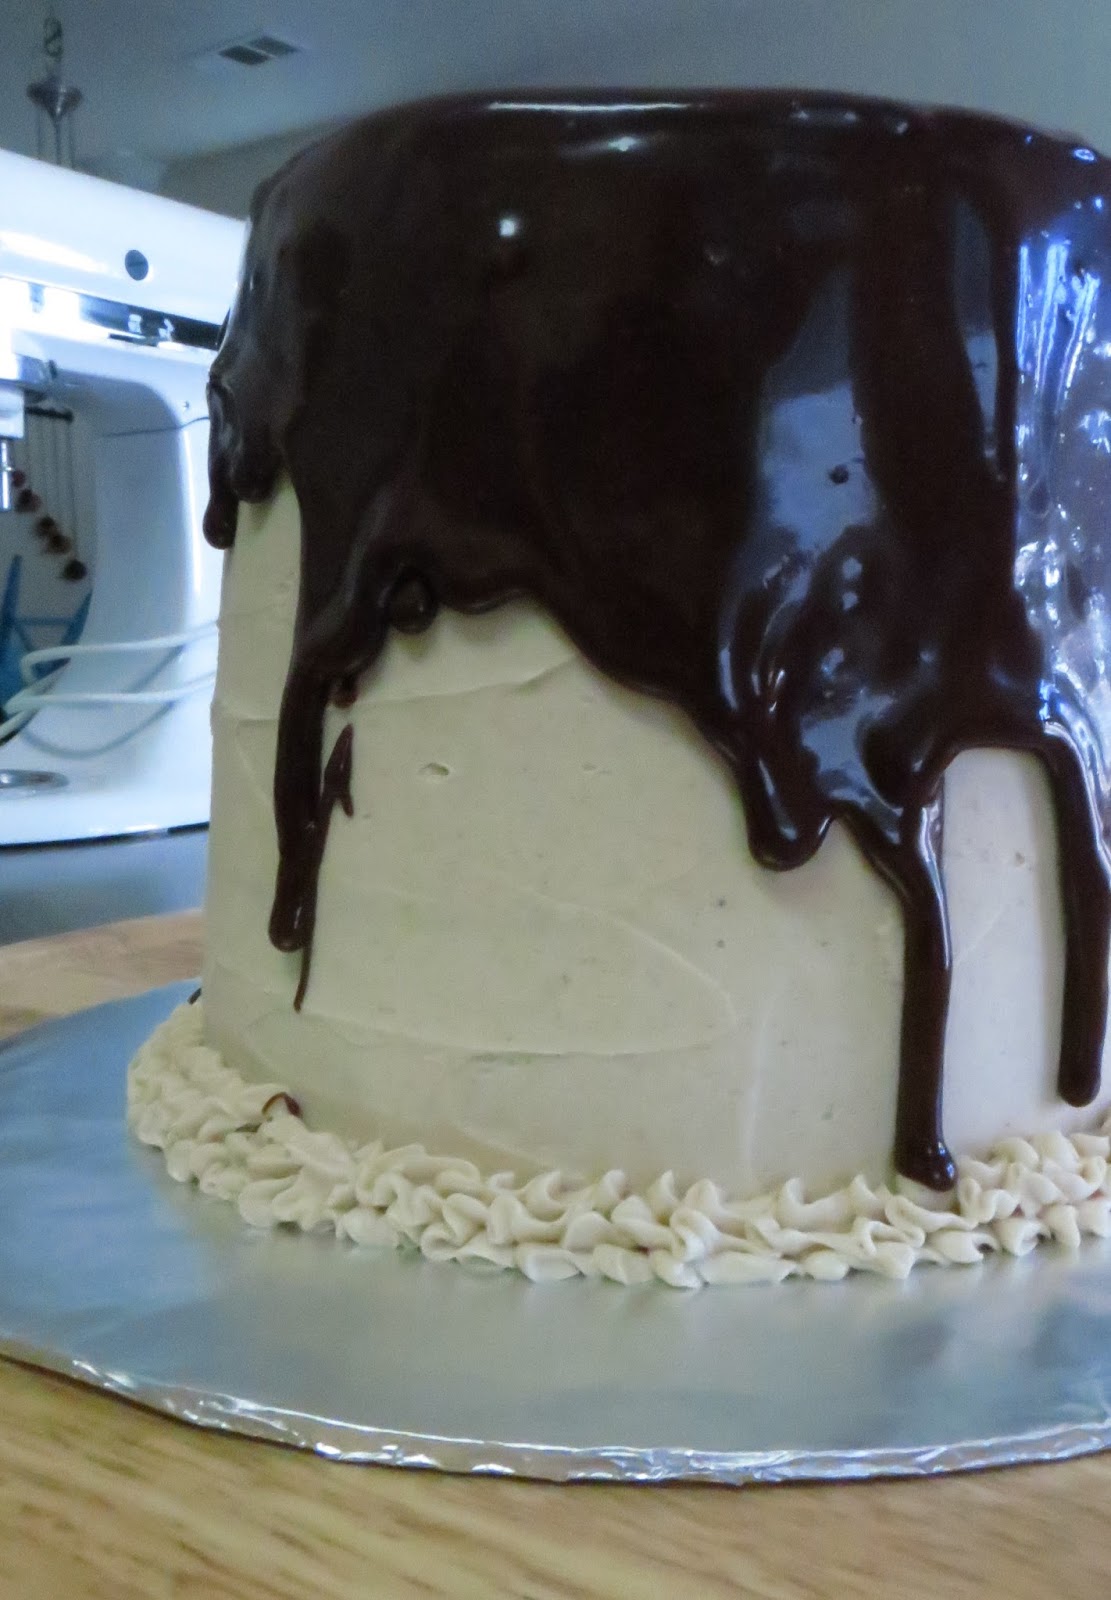
Take the cake out of the fridge and place on your turn table. With a spatula pour chocolate sauce over the top of the cake. You want it to drip down the sides and also have a smooth top. Do not play with top to much or your frosting will start to mix into the chocolate and mess to the top. Place into the fridge once again for an hour.
At this time it is time to chop a small handful of peanuts and then make the caramel sauce.
Caramel Sauce:
1/2 bag of caramel candies
3 tbs heavy whipping cream
Place both into a sauce pan and put the heat on low. Slowly stir until the caramel is melted and mixed with the cream. If the caramel sauce is to thick add 1-2 more tbs of cream. You want a sauce that is smooth and able to pour.
Get your cake out once again (I promise we are almost done here!!!)
Slowly pour the caramel sauce over the top of the cake. Do not use anything to spread of the top will start to melt away. I find the caramel sauce is heavy so be careful to not make the topping to thick. Sprinkle chopped peanuts over the top. Once again place into fridge to help caramel to stiffen and cool down. Ready to serve after and hour.


.JPG)


.JPG)