Hey there Friends,
I have just set up a new page on facebook with things I make that I have up for sale. Somethings can be shipped and others are only for locals. I am excited about this new adventure and ask that you go to my new page on facebook and like it. On facebook: www.facebook.com/goodiesbydesign.
Thank you for all your support!!
Cassie Hamilton
One item up for Sell: There are others there also.
This blog is all about homemade goodness. These will range from sweet treats to creative crafts. So enjoy!!
Tuesday, January 22, 2013
Tuesday, January 15, 2013
Happy V-day Treats
Well Valentines day is just around the corner. I am working on my things early so that I can send my wonderful hubby overseas his goodies box. I made him and the other soldiers with him, Chocolate covered rice krispe treat heart pops. These where fun to made and I sure hope everyone that gets them enjoys them. :)
Make your Rice Krispe treats:
1 1/2 tablespoons butter
2 1/4 cups small marshmallows
1 teaspoon vanilla extract
Melt together then pour over
3 cups Rice Krispies cereal
(I added one cup of choc. chips to the cereal before adding the marshmallow mixture)
Pour warm cereal into a shallow pan and with greased hands press down to make an even service. You want to have the treats to be about 1/2 inch thick because you will be putting two hearts together to make the Heart pop. Allow to cool and set for about thirty minutes.
Tools needed for the next steps:
Heart cookie cutter
cookie sticks
flat cookie sheet
parchment or wax paper
Red melting Chocolate
White melting Chocolate
Steps to make Heart Pops:
1. You will need to cut out an even number of hearts, because two hearts will make one POP.
2. Take a cookie stick and press into the middle of half of the hearts. Take the other half and press on top of the heart with the stick. Press the edges together.
3. Put the red melting chocolate into a microwave safe bowl, add about 1/2 teaspoon of veggie oil. Heat for 30 seconds and stir, if the chocolate is not completely melted put in for another 15 or 30 seconds.
4. Have a piece of paper on the top of the cookie sheet. Using a spoon cover each heart pop with the chocolate then place onto the paper.
5. Place into the fridge for ten minutes. While they cool melt a little white melting chocolate the same as you did the red. Once completely melted put the white chocolate into the corner of a sandwich bag (you are making a little piping bag)
6. Pull hearts out of the fridge. Snip off a little bit of the corner of your piping bag. Write messages onto the top of your hearts. Allow to sit to harden.
Pass out to your special Valentines!!!
Make your Rice Krispe treats:
1 1/2 tablespoons butter
2 1/4 cups small marshmallows
1 teaspoon vanilla extract
Melt together then pour over
3 cups Rice Krispies cereal
(I added one cup of choc. chips to the cereal before adding the marshmallow mixture)
Pour warm cereal into a shallow pan and with greased hands press down to make an even service. You want to have the treats to be about 1/2 inch thick because you will be putting two hearts together to make the Heart pop. Allow to cool and set for about thirty minutes.
Tools needed for the next steps:
Heart cookie cutter
cookie sticks
flat cookie sheet
parchment or wax paper
Red melting Chocolate
White melting Chocolate
Steps to make Heart Pops:
1. You will need to cut out an even number of hearts, because two hearts will make one POP.
2. Take a cookie stick and press into the middle of half of the hearts. Take the other half and press on top of the heart with the stick. Press the edges together.
4. Have a piece of paper on the top of the cookie sheet. Using a spoon cover each heart pop with the chocolate then place onto the paper.
5. Place into the fridge for ten minutes. While they cool melt a little white melting chocolate the same as you did the red. Once completely melted put the white chocolate into the corner of a sandwich bag (you are making a little piping bag)
6. Pull hearts out of the fridge. Snip off a little bit of the corner of your piping bag. Write messages onto the top of your hearts. Allow to sit to harden.
Pass out to your special Valentines!!!
Monday, January 14, 2013
Rainbow Birthday cake
Here is a cake that I just loved to put together. It was made for a fun, little gal who turned three. She just turned into a big sister to twins so this cake was make extra special for her. What little girl does not love bright colors and butterflies?
The cake on the inside match the colors on the out side. That means each tear of cake has four layers of cake.
I would like to talk about fillings!! Every cake needs a filling to help keep it a moist and flavorful cake. I used a strawberry filling with this cake : Fresh strawberries, strawberry jam, and a couple spoon fulls of frosting. I took these three and mixed them together. Now to just put the filling into the middle of your layers of cake will make a HUGE mess. As in the picture below do these steps:
1. Level cake
2. Pipe two layers of frosting around the sides of the cake top.
3. Fill in the middle with your filling
4. Place next layer of cake onto, press down the layer to help settle the frosting and filling.
5. Use a butter knife or small spatula and fill in the crack between the two layers with frosting and smooth out. This will help keep the sides of your cake level all around and not bulging.

To decorate this cake I use butter cream frosting (which can be found on another post), food colors, a piping bag, and tip 104.
The sugar flowers and butterflies I got from Micheal's craft store.
The cake on the inside match the colors on the out side. That means each tear of cake has four layers of cake.
I would like to talk about fillings!! Every cake needs a filling to help keep it a moist and flavorful cake. I used a strawberry filling with this cake : Fresh strawberries, strawberry jam, and a couple spoon fulls of frosting. I took these three and mixed them together. Now to just put the filling into the middle of your layers of cake will make a HUGE mess. As in the picture below do these steps:
1. Level cake
2. Pipe two layers of frosting around the sides of the cake top.
3. Fill in the middle with your filling
4. Place next layer of cake onto, press down the layer to help settle the frosting and filling.
5. Use a butter knife or small spatula and fill in the crack between the two layers with frosting and smooth out. This will help keep the sides of your cake level all around and not bulging.
To decorate this cake I use butter cream frosting (which can be found on another post), food colors, a piping bag, and tip 104.
The sugar flowers and butterflies I got from Micheal's craft store.
Thursday, December 27, 2012
Triple Choc. cake
I am a chocolate lover so this cake is right up my ally!! When growing up you are always told not to play with your food but that is exactly what I did with this cake. I played with different ideas that I thought would go well together and it worked!!!
2 eggs
1/2 cup eggnog
1/2 cup water
1/3 cup veggie oil
Bake cake at 350 degrees for 15-20 minutes. You will need three layers of cake so plan accordingly.
Mix all ingredients together well and bake cakes. Allow to cool completely before building cake.
Cake Filling:
1 brick of cream cheese (at room temp.)
1/2 cup dark chocolate chips
1/2 tablespoon Veggie oil
Melt the dark chocolate chips and veggie oil in a microwave safe bowl. Set microwave to 30 seconds and run. Once done stir until smooth. Put cream cheese into another bowl and beat until creamy. Allow chocolate to cool for about five minutes before you add it to the cream cheese. Mix well.
Build cake layers: (before you start level all three cakes) 1. Cake on tray (put crumb side up) 2. Layer of chocolate cream cheese 3. cake (put crumb side down) 4. Layer of chocolate cream cheese 5. cake (put crumb side down) Now lightly press down on the top of the cake to make sure all levels is even. Use a smooth side of a knife or cake spatula and smooth the cream cheese layers all around the cake. It should look like the picture below. Put into fridge for the cream cheese layers to harden. (about 30 minutes)
1/8 teaspoon salt
1 teaspoon vanilla
1 cup coco powder
4 cups Powder sugar, shifted
1/4 cup heavy cream, add 1 tablespoon at a time
1. Butter must be completely softened!!! Add to bowl and beat until creamy.
2. Add in the salt and vanilla and cream some more.
3. Shift all the power sugar and coco powder in a separate bowl and then turn mixer onto med. speed add 1/2 a cup at a time.
4. Allow to mix for about two minutes and then add the heavy cream. ONLY add as much as you need. It really depends on how tight or loose you would like your frosting to be.
5. Beat on High for about 2 more minutes to help get all air bubbles out.
Once the cake has set in the fridge frost whole cake. First do a thin layer to cover the whole cake and then add about a 1/2 inch more for a Nice layer of frosting.
As you see I pressed chocolate chips into the bottom half of the cake but you can also do nuts or chocolate shavings. For the top smooth chocolate Melt 1 cup chocolate chips with 1/4 tablespoon veggie oil in the microwave stir until smooth. Allow the chocolate to cool for about five minutes. If the chocolate is to hot it will melt the frosting off the cake.
Pour the chocolate over the top of the cake. I took a spoon and helped spread it around the top and just over the sides.
It will be ready to serve right away, but if it is for much later put into the fridge to set the chocolate on top. Before serving take out of fridge 30 minutes for everything to soften a little.
Triple Chocolate Cake:
Cake batter:
Rich chocolate cake mix2 eggs
1/2 cup eggnog
1/2 cup water
1/3 cup veggie oil
Bake cake at 350 degrees for 15-20 minutes. You will need three layers of cake so plan accordingly.
Mix all ingredients together well and bake cakes. Allow to cool completely before building cake.
Cake Filling:
1 brick of cream cheese (at room temp.)
1/2 cup dark chocolate chips
1/2 tablespoon Veggie oil
Melt the dark chocolate chips and veggie oil in a microwave safe bowl. Set microwave to 30 seconds and run. Once done stir until smooth. Put cream cheese into another bowl and beat until creamy. Allow chocolate to cool for about five minutes before you add it to the cream cheese. Mix well.
Build cake layers: (before you start level all three cakes) 1. Cake on tray (put crumb side up) 2. Layer of chocolate cream cheese 3. cake (put crumb side down) 4. Layer of chocolate cream cheese 5. cake (put crumb side down) Now lightly press down on the top of the cake to make sure all levels is even. Use a smooth side of a knife or cake spatula and smooth the cream cheese layers all around the cake. It should look like the picture below. Put into fridge for the cream cheese layers to harden. (about 30 minutes)
Chocolate Butter Cream Frosting:
1 cup Unsalted butter, softened1/8 teaspoon salt
1 teaspoon vanilla
1 cup coco powder
4 cups Powder sugar, shifted
1/4 cup heavy cream, add 1 tablespoon at a time
1. Butter must be completely softened!!! Add to bowl and beat until creamy.
2. Add in the salt and vanilla and cream some more.
3. Shift all the power sugar and coco powder in a separate bowl and then turn mixer onto med. speed add 1/2 a cup at a time.
4. Allow to mix for about two minutes and then add the heavy cream. ONLY add as much as you need. It really depends on how tight or loose you would like your frosting to be.
5. Beat on High for about 2 more minutes to help get all air bubbles out.
Once the cake has set in the fridge frost whole cake. First do a thin layer to cover the whole cake and then add about a 1/2 inch more for a Nice layer of frosting.
As you see I pressed chocolate chips into the bottom half of the cake but you can also do nuts or chocolate shavings. For the top smooth chocolate Melt 1 cup chocolate chips with 1/4 tablespoon veggie oil in the microwave stir until smooth. Allow the chocolate to cool for about five minutes. If the chocolate is to hot it will melt the frosting off the cake.
Pour the chocolate over the top of the cake. I took a spoon and helped spread it around the top and just over the sides.
It will be ready to serve right away, but if it is for much later put into the fridge to set the chocolate on top. Before serving take out of fridge 30 minutes for everything to soften a little.
Wednesday, December 19, 2012
Death By Chocolate Cookies
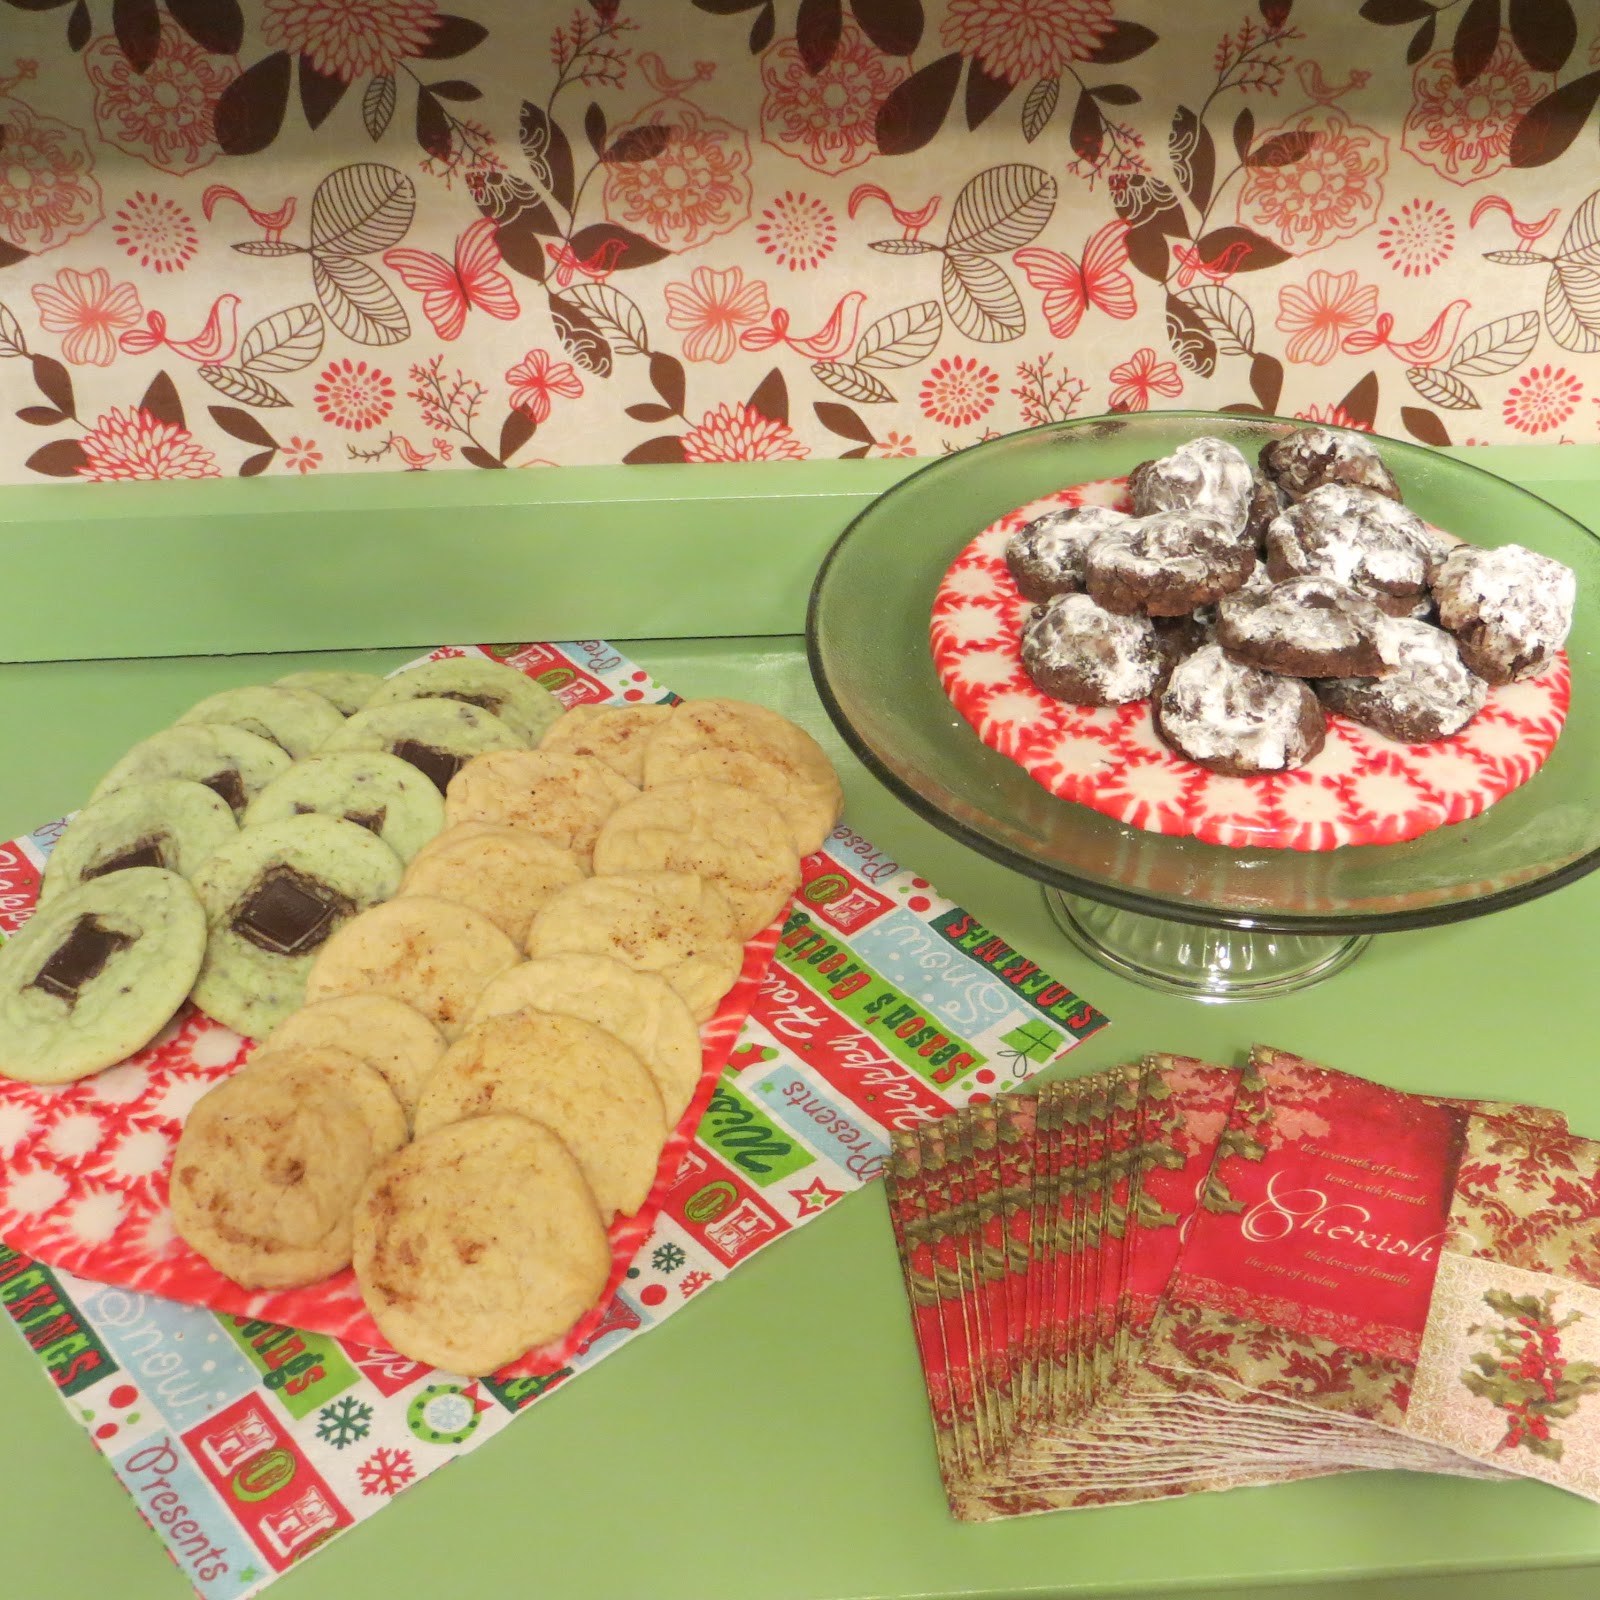
Had a fun little Christmas party the other night with all the cookies I have introduced for this Wonderful season. These death by chocolate cookies are so rich and delicate. They are flour and butter free which is nice for many people these days.
Death By Chocolate Cookies
Ingredients:
1 1/2 cup chocolate chips ( 1 cup use for melting and the 1/2 cup is to be added toward the end)
3 large egg WHITES, room temperature
2 cup powdered sugar (shifted)
1/2 cup unsweetened cocoa powder
1 tablespoon cornstarch
1/4 teaspoon salt
Directions:
1) Preheat oven 350 degrees and spray cookie sheets with non stick oil spray.
2) In a microwave glass bowl add one cup of chocolate chips and set for thirty second sections, stir until completely melted. Set aside to cool down a little bit.
3) In a separate bowl shift together 1 cup powder sugar, cocoa powder, cornstarch, and salt, set aside.
4) In the electric mixer use the whisk attachment, add the three egg whites (make sure they are room temperature) Whisk egg whites until soft peaks form.
5) Once the peaks are formed add 1/2 cup shifted powder sugar ( not from the bowl from step 3), continue whisking until the mixture looks like soft marshmallow creme.
6) On low speed add the dry ingredients from step three into the meringue. Make sure it is mixed well.
7) Take out of the mixer and finish the rest of the mixing my hand with a wooden spoon. Add the melted chocolate and the 1/2 cup chocolate chips into the meringue and mix. Then mixture will start to turn stiff.
8) Put 1/2 cup powder sugar into a small bowl. Make small round balls from the dough and roll into the powder sugar. Place balls onto the cookie sheet.
9) Bake cookies for ten minutes, once baked allow to cool for ten minutes on the sheet then remove to cool more. Once the cookies are completely cooled dip tops back into the powder sugar. Done!
This is the end to my cookie trilogy. I hope everyone enjoys them!!
1) Preheat oven 350 degrees and spray cookie sheets with non stick oil spray.
2) In a microwave glass bowl add one cup of chocolate chips and set for thirty second sections, stir until completely melted. Set aside to cool down a little bit.
3) In a separate bowl shift together 1 cup powder sugar, cocoa powder, cornstarch, and salt, set aside.
4) In the electric mixer use the whisk attachment, add the three egg whites (make sure they are room temperature) Whisk egg whites until soft peaks form.
5) Once the peaks are formed add 1/2 cup shifted powder sugar ( not from the bowl from step 3), continue whisking until the mixture looks like soft marshmallow creme.
6) On low speed add the dry ingredients from step three into the meringue. Make sure it is mixed well.
7) Take out of the mixer and finish the rest of the mixing my hand with a wooden spoon. Add the melted chocolate and the 1/2 cup chocolate chips into the meringue and mix. Then mixture will start to turn stiff.
8) Put 1/2 cup powder sugar into a small bowl. Make small round balls from the dough and roll into the powder sugar. Place balls onto the cookie sheet.
9) Bake cookies for ten minutes, once baked allow to cool for ten minutes on the sheet then remove to cool more. Once the cookies are completely cooled dip tops back into the powder sugar. Done!
This is the end to my cookie trilogy. I hope everyone enjoys them!!
Friday, December 14, 2012
Eggnog Cookies
Ok at this time of the year I love, love, love eggnog!! So I had to find a recipe for eggnog cookies. These cookies are pretty good but I think I can do better so if anyone has suggestions on making them the best ever please leave a comment!!
Eggnog Cookies
Adapted from: Holiday Cookies recipe book
2 1/4 cup flour
1 tsp baking powder
1 tsp ground cinnamon
1 tsp nutmeg
1 1/4 cup sugar
3/4 cup unsalted butter, at room temp. (1 1/2 sticks)
1/2 cup eggnog
2 egg yolks
1 tsp vanilla
Nutmeg
Instructions:
1. Preheat oven to 300 degrees
2. Shift together in a separate bowl: flour, baking powder, cinnamon, and nutmeg set aside.
3. Beat the softened butter and sugar together. Beat at least two minutes at medium speed (scrap sides a couple times during the two minutes). Add eggnog, egg yolks, and vanilla mix well.
4. On low add in the flour mixture. Mix only until all ingredients are well combined.
5. On an ungreased cookie sheet drop teaspoonfuls of the cookie dough, about two inches apart. Then sprinkle a little nutmeg onto the top of each dough ball.
6. Bake about 20-23 minutes or until lightly browned on the bottoms.
Eggnog Cookies
Adapted from: Holiday Cookies recipe book
2 1/4 cup flour
1 tsp baking powder
1 tsp ground cinnamon
1 tsp nutmeg
1 1/4 cup sugar
3/4 cup unsalted butter, at room temp. (1 1/2 sticks)
1/2 cup eggnog
2 egg yolks
1 tsp vanilla
Nutmeg
Instructions:
1. Preheat oven to 300 degrees
2. Shift together in a separate bowl: flour, baking powder, cinnamon, and nutmeg set aside.
3. Beat the softened butter and sugar together. Beat at least two minutes at medium speed (scrap sides a couple times during the two minutes). Add eggnog, egg yolks, and vanilla mix well.
4. On low add in the flour mixture. Mix only until all ingredients are well combined.
5. On an ungreased cookie sheet drop teaspoonfuls of the cookie dough, about two inches apart. Then sprinkle a little nutmeg onto the top of each dough ball.
6. Bake about 20-23 minutes or until lightly browned on the bottoms.
Andes Mint cookies
It is time for Christmas cookies!! I love making cookies but do not make them very often so Christmas is a great excuse for me to bake yummy cookies. This year I have made three new cookies that I am loving!!! The first one is Andes Mint cookies which is so Christmas, I mean just look at the color. :)
Andes Mint Cookies
2 3/4 cup flour
1 tsp baking soda
1/2 tsp baking powder
1/2 tsp salt
1 cup unsalted butter, at room temperature
1 1/2 cup sugar
1 egg
1/2 tsp mint extract
8 drops green food coloring
2 tablespoon milk
1 bag Andes mints (chop half of bag)
Instructions:
1. Preheat oven 375 degrees
2. Sift together into a small bowl: flour, baking soda, baking powder, and salt.
3. In mixer beat together butter and sugar. You will want to whip these together for at least two minutes, after one minute scrap sides of the bowl. Add mint extract, egg, and green food coloring. Make sure mixture is well mixed.
4. Add dry ingredients little at a time. Once you have added half of the flour mixture add one tablespoon of milk and then add the other tablespoon of milk once all flour is in the mixer.
5. Open up half of the Ande Mint candies and chop well. Add to dough and mix with a spoon not with mixer.
6. Wash your hands! Roll small balls of dough into your hands and place onto an ungreased cookie sheet. Open up the rest of the Mint candies and break into half and press into the middle of each ball.
7. Bake on a middle rack for 8-10 minutes, all to cool for two minutes on the cookie sheet and then remove onto cooling racks.
Andes Mint Cookies
2 3/4 cup flour
1 tsp baking soda
1/2 tsp baking powder
1/2 tsp salt
1 cup unsalted butter, at room temperature
1 1/2 cup sugar
1 egg
1/2 tsp mint extract
8 drops green food coloring
2 tablespoon milk
1 bag Andes mints (chop half of bag)
Instructions:
1. Preheat oven 375 degrees
2. Sift together into a small bowl: flour, baking soda, baking powder, and salt.
3. In mixer beat together butter and sugar. You will want to whip these together for at least two minutes, after one minute scrap sides of the bowl. Add mint extract, egg, and green food coloring. Make sure mixture is well mixed.
4. Add dry ingredients little at a time. Once you have added half of the flour mixture add one tablespoon of milk and then add the other tablespoon of milk once all flour is in the mixer.
5. Open up half of the Ande Mint candies and chop well. Add to dough and mix with a spoon not with mixer.
6. Wash your hands! Roll small balls of dough into your hands and place onto an ungreased cookie sheet. Open up the rest of the Mint candies and break into half and press into the middle of each ball.
7. Bake on a middle rack for 8-10 minutes, all to cool for two minutes on the cookie sheet and then remove onto cooling racks.
Subscribe to:
Posts (Atom)